Since July of 2013, we have been utterly consumed with the purchase and renovation of our first home. Having purchase a 100 year old home in New England we quickly realized that we will never be "done" with our renovation. We are, however, happy to be through with the first phase which dealt with most of our living space. Below are the before and afters with some commentary on the process. Over the years there will be much more to come...
Front Exterior
Before...
After...
On the exterior of the house we replaced the roof with Owen's Corning Estate Grey shingles, re-pointed and refaced the chimney, replaced all of the windows with Pella vinyl, and painted the trim color Benjamin Moore Storm Cloud Gray. We replaced the front door (which used to be a hollow laminate bedroom door!), got a new mailbox, new house numbers and as a little diy project spray painted the lamp-post black and replaced the light fixture on the top. We also spent a couple weekend with my Dad cutting back and ripping out most of the bushes and the front hedge.
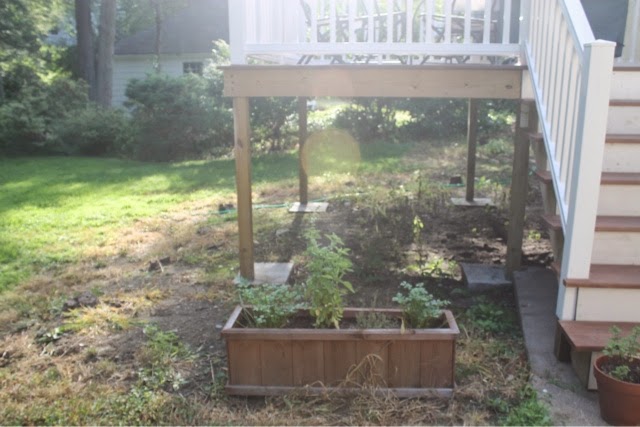
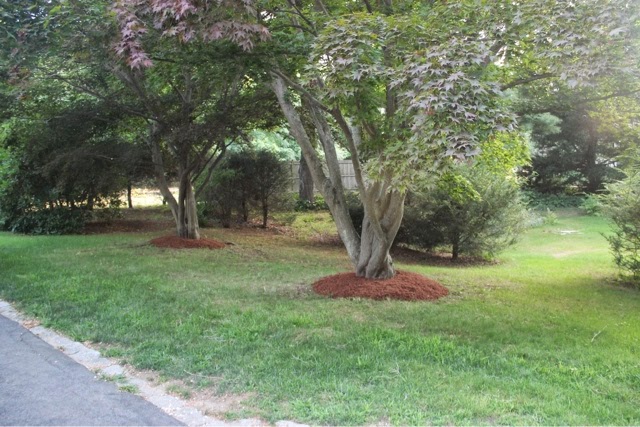
Rear Exterior
Before...
After...
One
of the more major projects we undertook was to "patch" the stucco on the
house. This essentially turned into completely re-stucco-ing the entire
house. With years of water damage and poor patching here and there,
there was no other choice. Though we would have loved to paint the
house (a nice light gray...maybe next year?) to save money the stucco
was tinted to match the house. Half the front and almost the entire
back of the house had the stucco chipped away and was re-plastered. You
can see the slight color difference of the new and old stucco on the pictures of the front of the house.
We also took down a massive tree limb which was over the roof, ripped out the bushes which surrounded the deck, and...replaced the deck! This was always on the list but seeing as it collapsed half way through the renovation, there wasn't much choice...we had hoped to expand it but again, decided to hold off on this and save it for a project down the road.
Finally, the garage is a whole other project for another day. In the short term there was a shed built off the back with a roof that was falling off which was ripped out along with a plywood box to hold garbage. We still need to paint the garage, the trim and replace that roof. It just didn't make the scope this time around!
Foyer
Before...
After...
Again, we replaced the door, windows and out contractor build custom diamond window grilles in keeping with the style of the home (built in 1920s). We left the slate floor, but re-finished the hardwood to a walnut color and installed a threshold. The nasty paneling was painted benjamin moore linen white and the entire house brightened up.
Dining Room
Before...
After...
The dining room used to be the living room of the house. To the left when you walk in there was a serious amount of water damage from the leaking roof, wallpaper, 30 year old carpet, loads of bizarre electrical and what can't be communicated is the smell that really existed in the whole house. With old rope windows, most of them broken, we are pretty confident that a window hadn't been opened in over 10 years... The carpet was ripped out, floors refinished, wall paper removed, walls painted benjamin moore boothbay gray, fireplace painted, ceiling painted and the room re-purposed as a dining room with a sitting area at the front. The biggest change came from sealing off the entry to the "addition" as we used to call it (now family room) and creating an opening between the two room in the center with double french doors.
Family Room
Before...
After...

The addition was added on the house in we believe the early 80's when most of the house underwent a pretty major renovation. We are pretty sure it used to be some sort of porch. It is definitely the biggest room in the house and is now where we spend most of our time. The issue was that it was completely cut off from the rest of the house. We created an opening between the two rooms by sealing
off the entry which was all the way at the front and adding double french doors. As you can see the room suffered from some serious paneling, the same gross carpet and once again (as was a theme in the house) A LOT of weird electrical, including the built in stereo system. We plastered one wall (with the doors) and painted the paneling in the rest of the room, benjamin moore linen white (benjamin moore white dove is the trim and ceiling color throughout the entire house). We replaced all of the recessed lighting with 25 yr LEDs, replaced all the outlets, replaced the carpet and had the massive picture window split to look like three separate windows. This was the only window in the house we didn't replace since it was already double paned and HUGE. Our contractor created the same custom diamond window grilles in this room to break the window up and add a bit of character.


Kitchen/Dining
Before...
After...
Every room in the house feels like such a big transformation but as with any house I think the kitchen is probably the biggest one. To the right of the house when you walk in was a dining room with one doorway entrance to the kitchen, which was at the back of the house. In the interest of preventing the world's longest blog post I'll let these pictures speak for themselves. We knocked down the wall between the kitchen and dining room and created a big eat in kitchen. The kitchen was completely gutted (3 layers of floor and 3 layers of ceiling) and re-configured. Maybe one day I'll have some energy for a whole blog post on this room.
Powder Room
Before...
After...
Stairway
Before...
After...
Believe it or not, the stairway of the house was probably one of the scariest places. The plastered/textured walls were covered in years of dirt and smoke and seemed to have collected all of the filth from the house. The stairs had the remnants of a chair lift and the whole thing just made you feel like you were in a decommissioned insane asylum! When the drywall was put up with a fresh coat of paint I finally started to feel like maybe we really could turn this place around! We added a pendant light in the stairwell. Though I haven't mentioned it in every room, every single light fixture was replaced.
Main Bath
Before...
After...
We're pretty convinced that the state of this bathroom at the open house is one of the main reasons we got it. The ceiling had caved in and was partially removed, however, the tenants (grandchildren of the estate) were still actively using the shower...they just put a tarp around it! Needless to say this room was gutted top to bottom and the shower wall re-framed thanks to the water damage. Again, this room alone could take a separate post!
Sadie's Room
Before...
After...
No doubt Sadie's room is small but with all the junk packed in it before it felt like a shoe box!!! As with every room, some demo, ripping out an old ballet bar and some wood slats on the wall. Then it was just some paint (benjamin moore edgecomb gray) and windows in here making it a fresh, cozy nursery.
Guest Room
Before...
After...
The horsehair plaster ceiling was replaced with drywall, the grasscloth wallpaper ripped down, light fixture centered and replaced, benjamin moore spring mint, windows and done!
Master Bed
Before...
After...
We don't have many pictures of this room before. All I remember was how dark it was. The fireplace covered by some bizarre plywood insert with glued on glass tile. The mantle had to be partially removed and repaired to get it out. We also found that the back of the fireplace was a magnetic pop out with some kind of stash cabinet. Hmmm....makes you wonder what they were keeping in there! We added a light fixture to the center of the room, replaced the sconces, repaired and painted the fireplace, and added a fresh coat of paint to the room, benjamin moore woodlawn blue.
Master Bath
Before...
After..
The master bath was another room that didn't quite make the cut for a full renovation. We did what minor things we could to make it feel fresh and clean but hope to tackle it as a more serious project down the road. We ripped out the existing vanity/counter, medicine cabinet, and one of the weird built ins that took so much space. We replaced it with a single sink vanity, mirror and thin table. That was about it.
SO....that's where we are today. Lots more to come over time we hope...master bath, basement, garage, landscaping, patio etc... Something tells me with this house it will never end!